

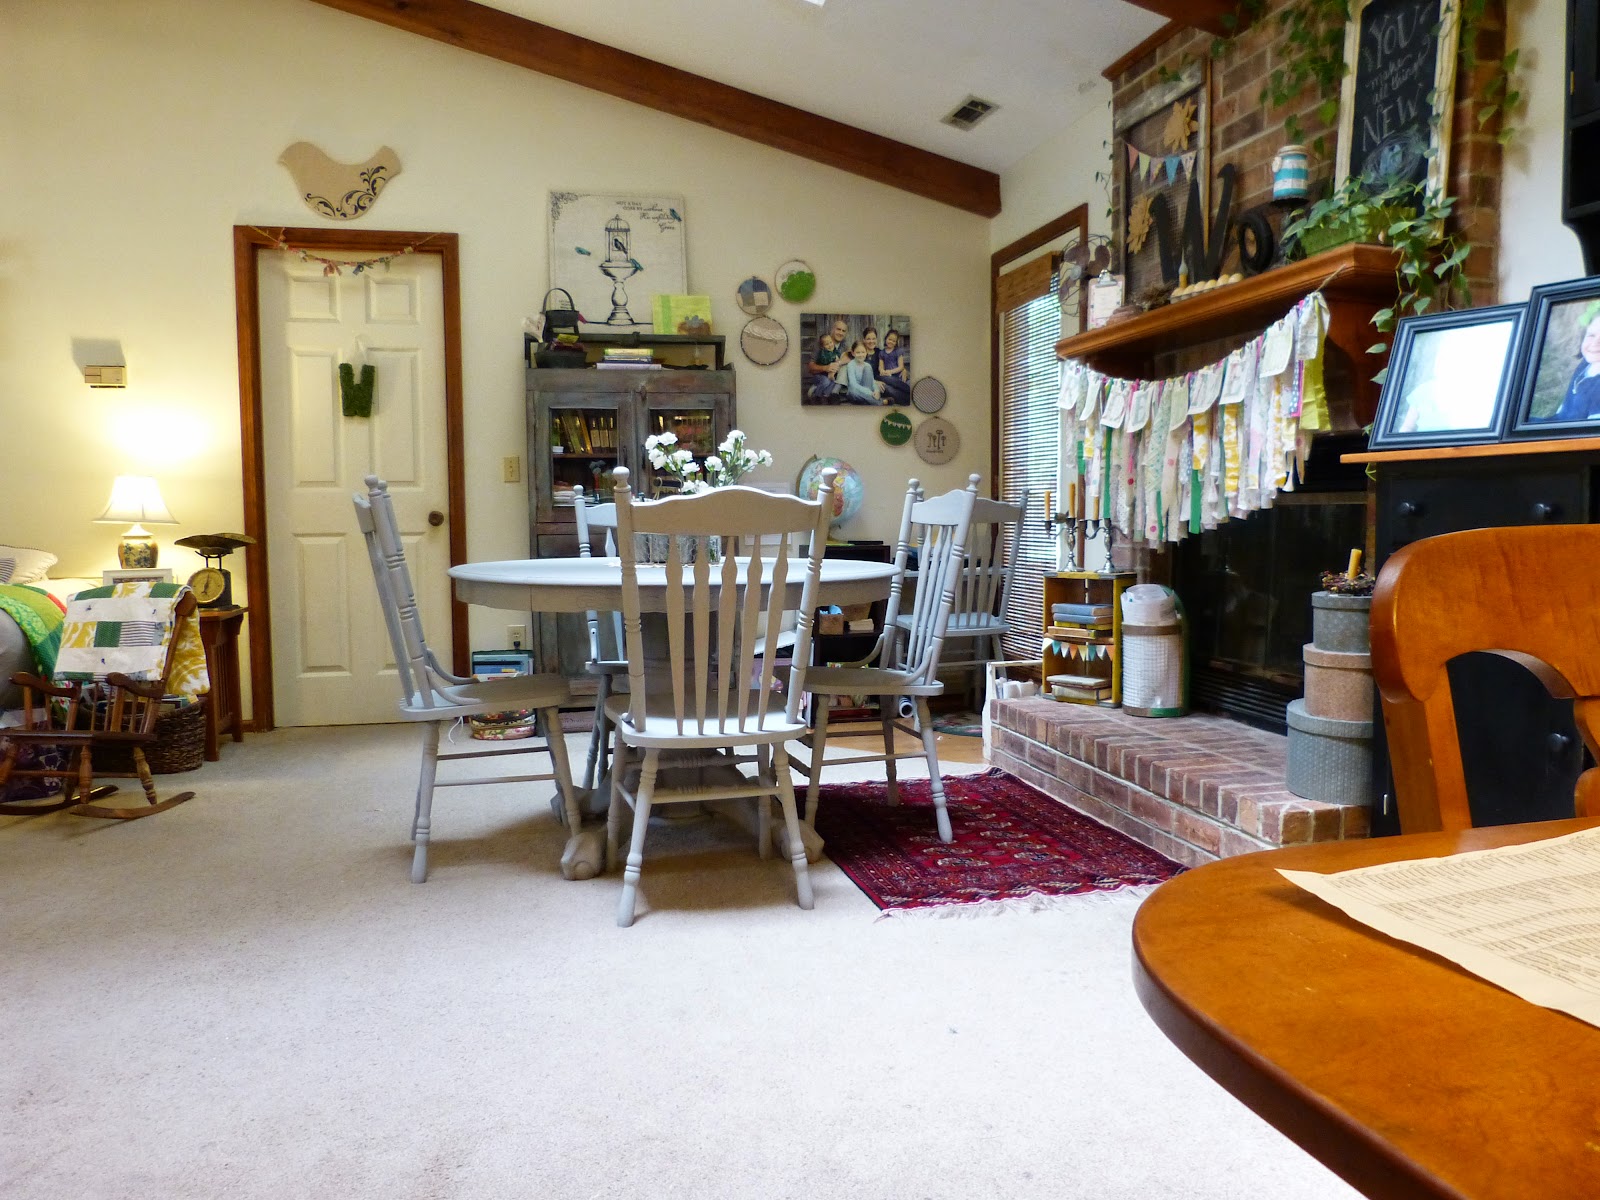
As you saw in my last Slow Day post, I painted our school table! I've never liked the color/finish but it was just one of those things that I couldn't decide what I wanted to do with it. And, then it started really bothering me to look from the kitchen towards the living room and see about a dozen chairs. I was having chair spindle overload and it looked busy. So I was looking for a way to quiet that space.
Around that time, a friend came over and mentioned that gray would look good and would help define the two spaces separately from one another {school/dining}. Well, you know how I feel about gray! {loooove!}
In typical-to-me fashion, I grabbed all the leftover paint from my kitchen cabinets and poured them into a jar from my recycling bin, then I filled the jar up with black chalkboard paint and shook/stirred it reeeealllly good! Used what I had, boom, this color was born! This is why I say this re-do was free, because I used what I had!!!
It was also pretty spontaneous. As in, I woke up one morning and decided that was a good day to work on it. I mixed up the paint and laid paper out on the floor before my littles woke up :) Then I announced once they were up that for school that day, we were going to learn how to paint a table! Ha! Rachel gushed over and over about how that was the best school day! She likes projects like her mama apparently ...
What I love about chalk paint {ASCP} is that you do not need to prime or sand. Glory. Hallelujah. Those two things {priming and sanding} can quickly take all the fun out of a re-do project. My cabinets have held up great so I was ready to go for it and tackle the table.
This is simply one coat of my homemade concoction of chalk paints. For inquiring minds, it was an old coconut oil jar and it had about 1/3 ASCP Old White, about 1/3 ASCP Old Ochre and about 1/3 black chalkboard paint from Lowe's. After letting that dry, I did Minwax Clear Polyurethane top coat. This is the same thing I did on our kitchen cabinets and on our dining room table when I refinished it years ago. With the chalk paint, you can use wax for the top coat, but I feel a little hesitant about that working for high traffic pieces or areas {like a kitchen or school table!} so I use the poly top coat to give it a more durable finish.
And, by the way, see how when you are looking from the kitchen, it just sort of vanishes and doesn't pop out as much anymore?!

Because I seem to work in and love layers, just painting it wasn't quite the finishing touch for me. It took one full morning until lunch time to paint five chairs and the table. I wanted it to look a little aged which is why I only did one coat, so the bottom finish would show through a bit. A second coat would probably take care of that if that did not suit your taste.
That afternoon, I was walking by and instantly remembered a magazine article I'd seen in Life: Beautiful where they had stenciled "give thanks" on the back of the chairs around Thanksgiving time. This was considerably less thought-out, I just grabbed a Sharpie and in five minutes, they all had words on them:


The words I chose were: Wisdom, Knowledge, Understanding, Truth and Goodness. If I'd needed one more - I would've done Beauty for the last one.
By the way, these words were added before the poly top-coat. Then, in my layer-thinking mind, I was mulling over how a light colored table and three energetic children may not be a great combo for their school workspace. And, then remembered a friend having some chalkboard placemats. Bingo! That was the ticket.
I spent $10 on a set of four hard placemats with the cork on the back at TJ Maxx. I painted them with black chalkboard paint and ended up putting a layer of clear poly on them because they were looking like they were going to chip. The verdict is still out on these though I really wanted them more for hard workspace than for chalkboard. And I do love how they look.

The last piece of this project was to make pillows. In observing our school habits, I've noticed when we sit at this table, we are more productive and things go more smoothly. However, the chairs are hard and we were showing tendencies of gravitating to the couch more often than not. So, pillows were a definite must to help make this a more workable space.
I have eyed grain sacks for years! And, wanted to make pillows from a grain sack. When my CC mamas gave me Etsy and Amazon gift cards at our End of Year Celebration, I treated myself to four pillow inserts and a big grain sack. This grain sack stated it was from 1907 and was in really good shape. It was almost as tall as me {five feet} so it was a big piece to work with. I made all four pillows with no room to spare, but love how they look!!!
The pillows were not technically free, but they were a gift to me from sweet mama friends which I will enjoy remembering when I enjoy seeing/using these pillows! The grain sack came all the way from Germany and has amazing color and texture, much better than I even expected from the photos on Etsy.

I'm so happy with how it turned out! It reminds me of when I painted our kitchen cabinets and wondered why I waited so long!
7 comments:
Oh me oh my... that turned out Fantastic. Love, Love, Love it. Love that you painted words on the chairs, loved that you didn't pay anything for this project. You rock Monica.
You are amazing! And, frugal. Love it. God has certainly gifted you with an eye and an ability to implement your ideas - naturally. ((I can relate a bit)) but you by far "get it done" when the idea strikes.
This is so inspiring!!
I love how your kids are "freely" by your side - and getting to reap the bounty of blessing that you (and David) are!!
Blessings!
Love! The fact that you did this for no money out of your pocket is amazing. The wording on the back of the chairs makes it unique and personal. Great job!
Awesome ideas once again. The words on the chairs look so nice! I am really liking the chalkboard placemats as well. I had no idea that you don't need to prime if you use chalk paint. Thanks for sharing that info!! I look forward to your blog each day, it is so inspiring!!!
Monica, what a wonder post..... I am as well a frugal mama, anything to save is better for us...... I love the transformation you did on the table.... And the grain sack pillows are awesome!
Blessings
Rhonda
Ps like to see your kitchen cabinets, are they gray?
This turned out great! And I'm always impressed by the way you fearlessly (and successfully!) dive into projects like this - great job!
Oh, I love the words! ❤
Post a Comment